DMSS App Set-Up
1. Download & install the DMSS app
2. Once the app has been downloaded, create an account by clicking on the 'Sign Up' button.
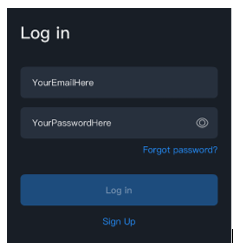
(Either a personal account or a shared account for multiple people to access)
3. Once the account has been created, we advise you to inform us which email address has been used to create the DMSS account. Please send to ptz@ninehundred.co.uk.
By doing this we will be able to add the users account to the camera they have purchased / hired before receiving them.
Please be aware, users can be added at a later date if required.
Once we have received your information, we can add the user to the device. The user will have access to the device, no password or username required.
How to Add Users To Your Devices
Once you have been granted ownership and accepted, you will then see below,

You will instantly be able to see the camera on the DMSS app. To add colleagues, simply press the ![]() icon.
icon.
You should then see the below. Add the emails of the accounts you want adding to the device , ensuring they have created and verified the DMSS app account. Once the email has been entered, click share and the users will also get instant access to the device.

The image below shows the permissions tab. This allows the owner of the camera to alter permissions they may want to give to colleagues, for example, disable them from moving the camera.
How To Remove Users From Your Devices
To remove users from access to your camera, click where the camera icon is at the top of the page. This will then take you to a page showing all current users on the camera.


Select the user you want to delete by clicking on the persons email address, then at the bottom of the page it will show "Cancel Sharing". Select "Cancel Sharing" and the user's access will be removed from this device.

You can also modify a user's permissions in this view by clicking the edit button.
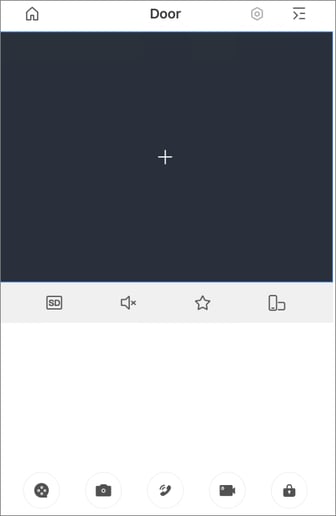
Live View
You can view the monitoring channels and do the operations such as taking snapshots, recording videos, and adding channels to favourites.
Step 1
On the Home interface, tap ![]() .
.
Step 2
Play a channel or multiple channels
- Play a channel: Tap
 in the window, and then select a channel in the device list to be played
 - Play multiple channels: Tap
 , select channels in the device list as needed.
When displayed channels exceed the maximum number of displaying window you set, swipe left or right to view other live videos.
Step 3
Operate on the live videos

| Function | Description |
| Device details |
Tap
|
| Play/Pause | Tap |
| Video Stream | Tap |
| Mute/Unmute | Tap |
| Window Split | Tap |
| Landscape | Tap |
| Recording playback | Tap |
| Snapshot |
Select a video, and then tap
|
| Video recording |
Select a video, and then tap
|
| Voice chat |
Select a video, and then tap Tap and hold the icon till the Voice Call interface is displayed. Tap the device to which the channel belongs to enable device talk if the function is supported.
|
| Memory play/Close videos |
Memory play: Tap Close videos: Tap |
| PTZ Control |
Select a video, tap Tap Tap Tap Use
|
| Fisheye |
Select a video, tap
|
| Wipers |
Select a video, tap Tap Single, the wiper works one time, and then stop. Tap Enable, then configure time interval, the wiper works after each time interval. Tap Stop, the wiper stops working.
|
| Spotlight/Buzzer |
Tap
|
| Change video place | Tap and hold a video, and then you can move it to the target window. |
| Enlarge window | Double tap the window to enlarge it. Double tap again to restore. |
| Help | If the video is not properly played, tap Help in the window to solve the problem. |
| Delete video | Tap and hold a video till the trash bin appears at the top of the interface. Drag the video to the trash bin, and then release. |
Step 4
Click ![]() to select the date to view the corresponding video as needed.
to select the date to view the corresponding video as needed.
Video Playback
You can search and play back videos according to time, video type, and channels.
![]() Before playing back videos, you need to set alarm rules and record plan of the channel.
Before playing back videos, you need to set alarm rules and record plan of the channel.
Step 1
On Home interface, tap ![]()
Step 2
Tap ![]() or
or ![]() to select a channel or multiple channels.
to select a channel or multiple channels.
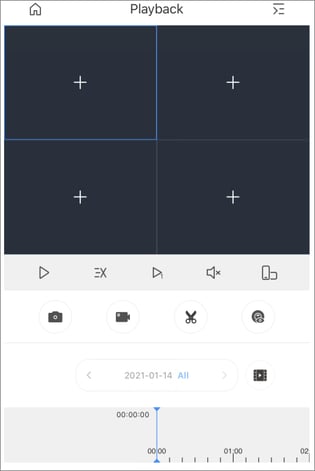
Step 3
Tap ![]() to change date and record type. The data with a blue dot means it has videos.
to change date and record type. The data with a blue dot means it has videos.

Record types are as follows:
- All (grey): Play all types of records by default
- Regular (green): Normal recordings
- Alarm (red): Record when alarm is triggered, such as audio alarm and local alarm
- Motion Detection (orange): Record when motion detection alarm is triggered
- Smart Recording (yellow): Record when smart event alarm is triggered such as face detection and recognition, IVS, video metadata, and more.
| Function | Description |
| Play back videos |
Select a video, and then you can:
|
| Clip | Select a video, and then tap  to set a start point, and then tap to set a start point, and then tap |
| Time bar | The colour block indicates recorded videos with different types. Grey means all videos; green means regular videos; red means alarm videos; orange means motion detection videos; yellow means smart videos. Drag the time bar to view the record of any time frame. Pinch or stretch out to zoom the bar. |
Video Call
You can view the live video of the added video intercoms, realise video calls between the device and App, lock/unlock the door and more.
Step 1
On the Home interface, tap ![]() .
.
Step 2
Tap ![]() or
or ![]() to select a channel.
to select a channel.
| Function | Description |
| Video stream | Tap |
| Mute/Unmute | Tap |
| Favourites | Tap |
| Landscape | Tap |
| Recording playback | Tap |
| Snapshot | Tap |
| Answer/End the call |
App answers the call from VTO: Tap
|
| Recording | Tap |
| Unlock |
Tap
|
Step 3
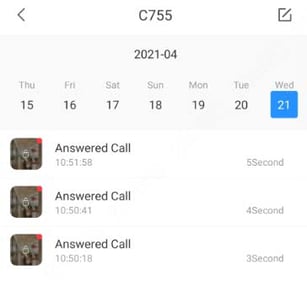
View the call history of VTO between app.
Tap Message at the bottom of the interface.
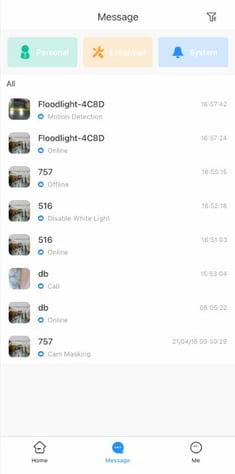
Tap a VTO as needed, and then you can view the call history (such as time, duration), and play back the recorded video.